Light, oh light is magical. And the "world" of light in food photography is even more magical, in my opinion.
Light is the most important part in photography.
The word itself says so: you probably know that it comes from the Greek photós and graphé. So, it literally means "drawing with light".
They say "No Martini, no party" (remember the commercial?)
I say No light, no photography.
Imagine being in a field at midnight, no moon, no houses around, no lights, no torch. Nothing. What would you see? Pitch black.
Same with photography. Light is the essence.
I know that you could think this is a very basic topic but trust me: in these past few years I've learned there's always something to learn about it (and I wish someone told me that, earlier in my career).
Enough talking, let's see 5 tips on how to master light in food photography, and HOW you can actually implement the following advice.
1. "Bad" light in your workspace? Analyze
“Oh, I have such a bad light in my workspace!”
Some people said to me these words, in the past. More than once.
Well, good news: there’s no RIGHT OR WRONG light, bad or good.
Light is light. Instead, you have to understand WHY you think it looks "bad" in your photos.
It's also a little bit subjective: what I’ve noticed is that some people think it’s "bad" because in their space the light is too intense, others because they think they don’t have enough.
At the end of the day it really depends on the result (mood, message) you’re trying to achieve.
And every workspace has its potential.
>>> IMPLEMENT TODAY:
Take time to analyse your workspace and see what it has to offer.
Ask yourself where your light is coming from, where the window is facing, where's your scene compared to the source of light, if your room has colored elements (walls, furniture...) etc
Then think about how you can take advantage of the space and manipulate light accordingly.
Example: if you have colored walls you may have color contamination, in your photos. Take precautions (use some neutral boards around the scene).
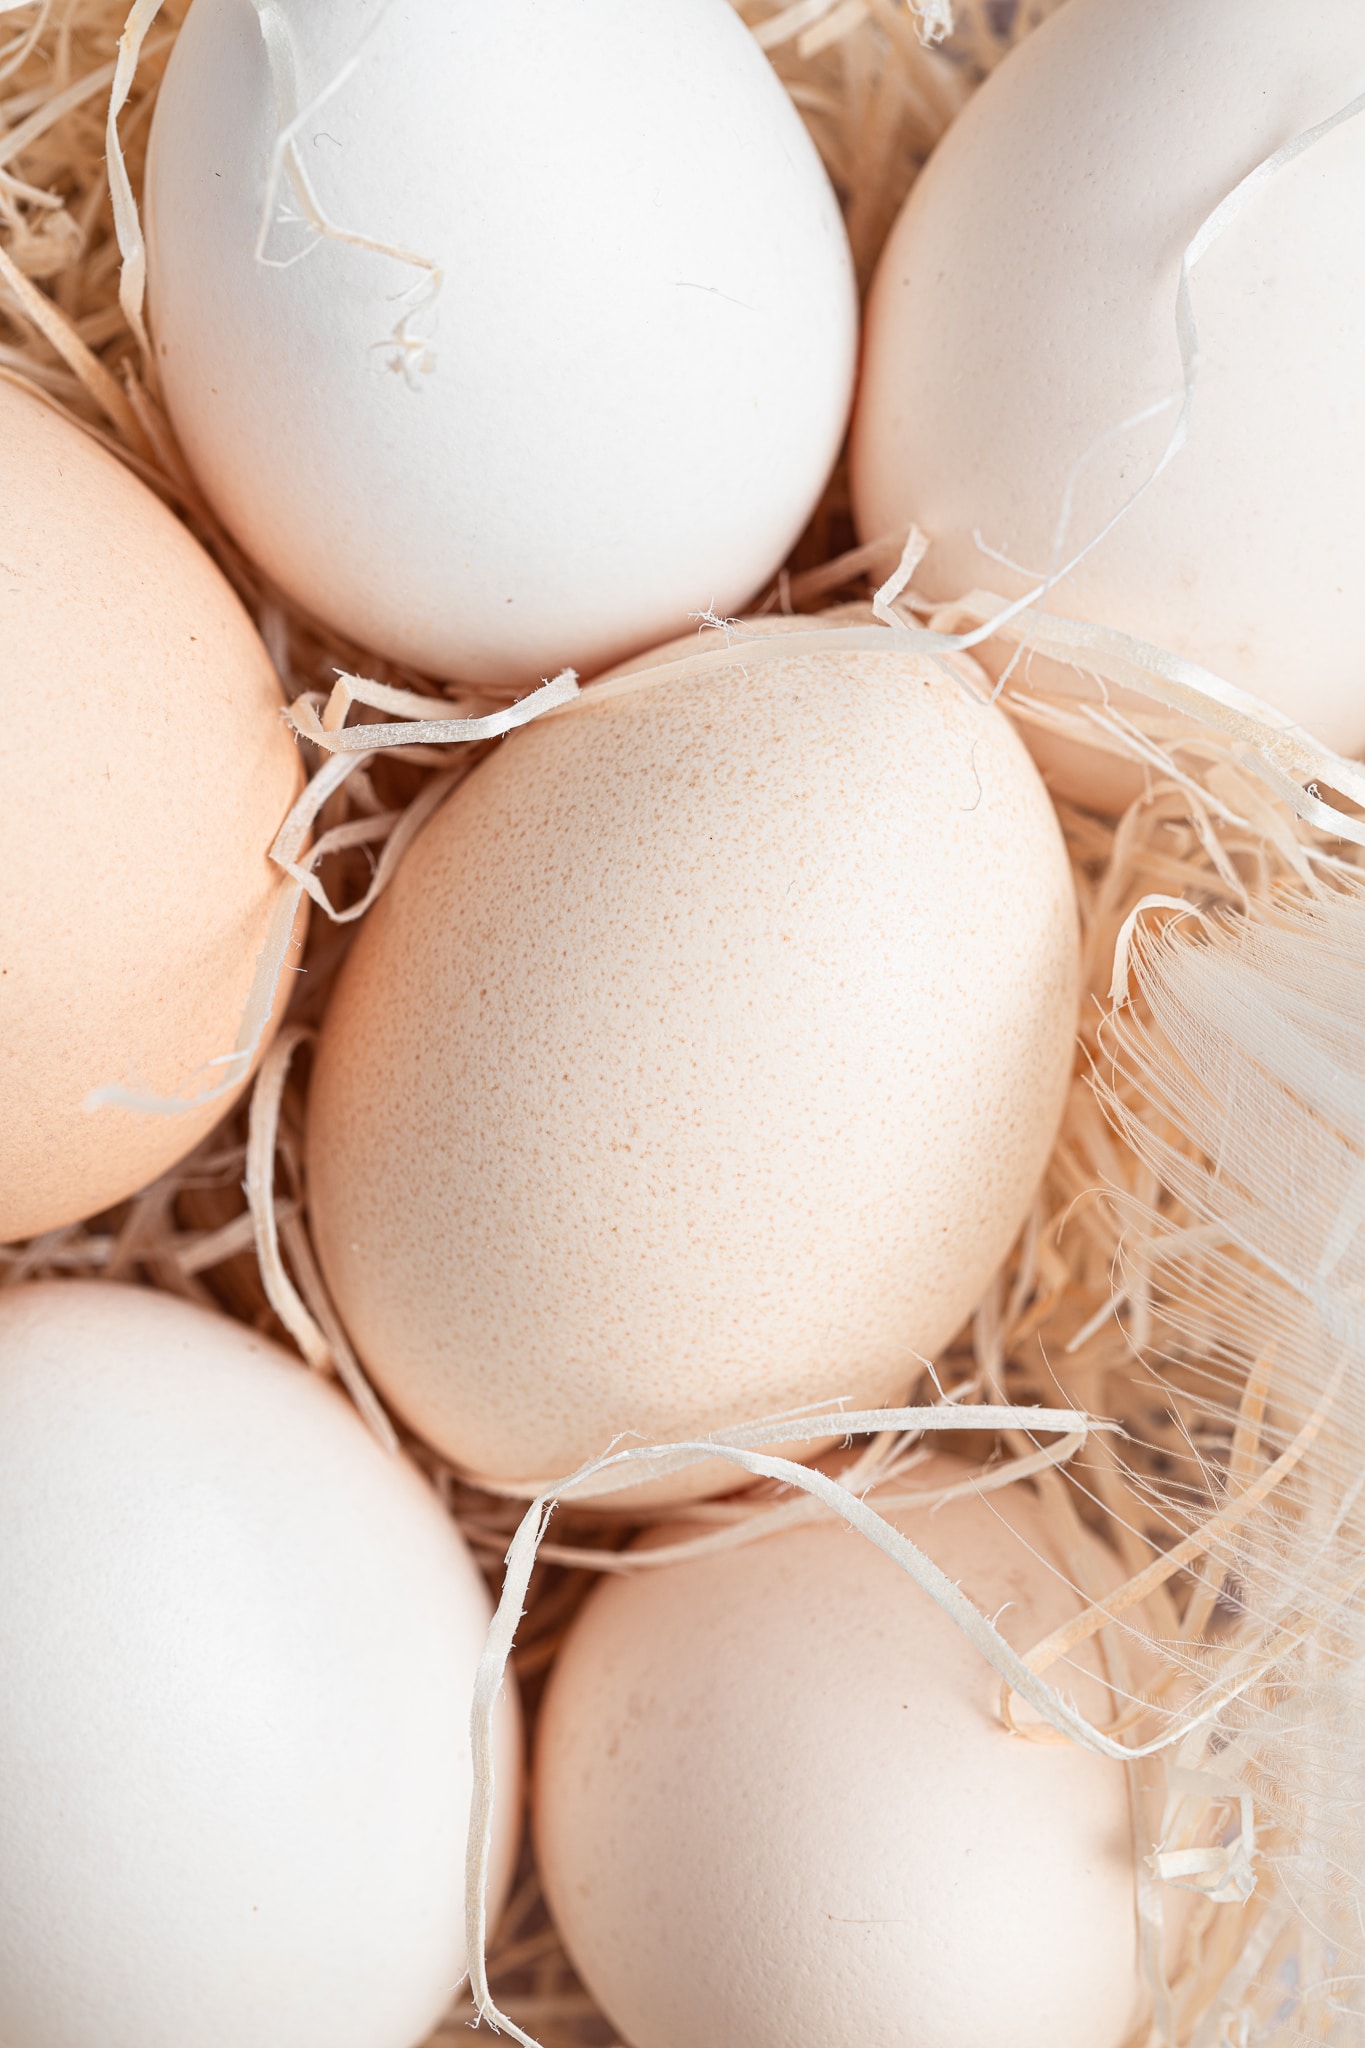
I usually take photos with a South-West facing window - because I love the intense light it gives me - but, to shoot the photo above, I went to my bedroom and shot with a west facing window instead, which - being indirect in the morning - gave me a softer look.
P.S. I am talking about natural light in this paragraph.
2. Flat images? Shadows are key
Do not ignore shadows.
Seems pretty obvious but it’s not (at least not to me at the very beginning). Here's why.
A lot of people looooove playing with a bright atmosphere, thinking they only need a looooot of light. But oftentimes this leads to paying less attention to shadows.
(Please, no reason to feel “guilty”, I used to do this too.)
The thing is that lack of shadows means your photos may look flat.
Not saying they always have to look intense and dark. But they have to be there.
Even if soft and very subtle.
Remember that our goal is to have a three-dimensional photo.
YES, even though we want an airy ethereal atmosphere.
My tip when the shadows are very subtle: find an expedient to give even more depth to the image.
>>> IMPLEMENT TODAY:
Once you know what your workspace has to offer, the type of light you have and how it behaves, learn how to manipulate it paying extra attention to how the shadows look (especially if you have the tendency to avoid them).
Harsher shadows? Softer? How about the contrast? How much tonal contrast do you have in the photo? These are all things you need to ask yourself.
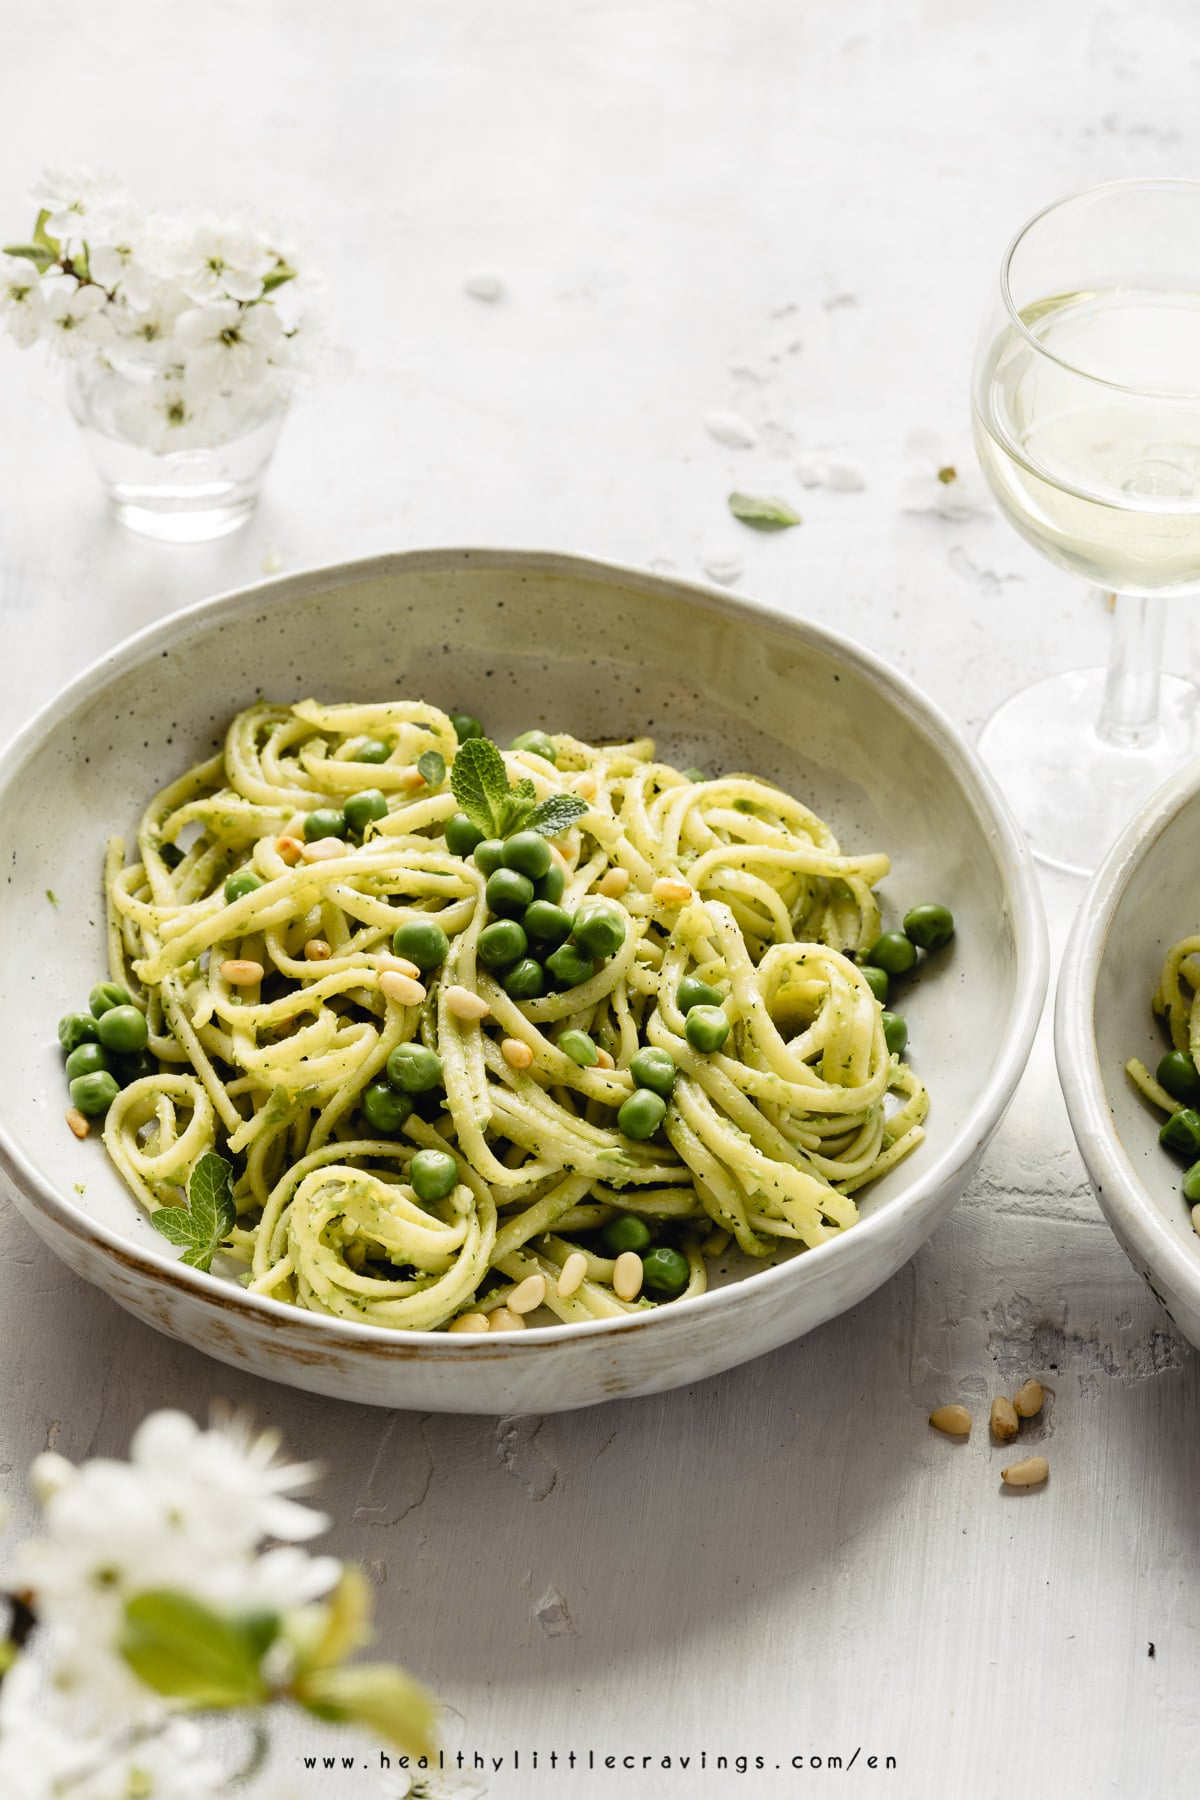
In this case, my goal was to give the photo Spring vibes. See how the shadow is subtle but visible?
3. Is something "off"? Expose correctly
ETTR? ETTL?
"What does that even mean?" , I hear you saying.
It means “Exposing to the right” (ETTR), and “Exposing to the left” (ETTL) - (compared to the histogram).
I think the debate is still going on.
Is it better to overexpose a tiny bit? Or underexpose?
I have always been team ETTR and recently invested in a workshop with the AMAZING Marianna Santoni (she's a guru and has been teaching for years and years) that confirmed what I thought. She very well explained it from a technical perspective and I was happy to finally receive confirmation.
It was an 8-hour workshop so it would be impossible (and it wouldn't be fair for teacher and those who invested) to share everything, but ONE thing you have to know is that: you have to develop the habit of exposing to the right.
Meaning you have to play with the settings - ISO, aperture, shutter speed - to let a lot of light in, so you collect as many information as you can, while shooting. CHECK YOUR HISTOGRAM: where are the information?
(If you don't know what I am talking about, take a step back and read this post on camera settings for food photography.)
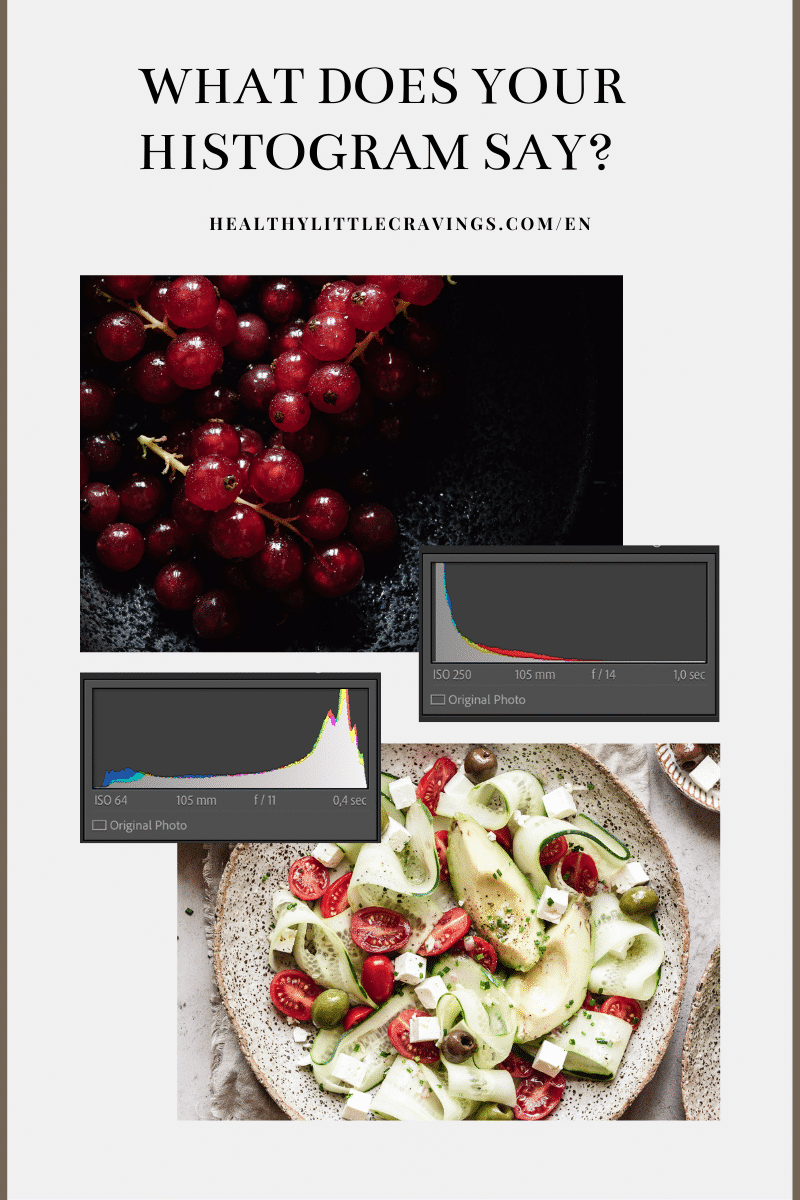
Overexposing (without blowing out the brightest and essential** - I said essential, read below why - areas) has multiple advantages.
Long story short, from a technical point of view it allows you to collect a lot more information on the bright areas so then, when you decrease the exposure while editing, you don't lose any important detail.
The website thewayeyeseesit.com indeed says: "Most of the light-capturing capability of a digital camera sensor is geared toward the bright side of the tonal scale, recording a lot of detail in the lightest areas of the picture. Unfortunately, the middle and three-quarter tones in a scene don’t get recorded with as much accuracy. There just isn’t enough light in those areas to make as much impact on the image sensor."

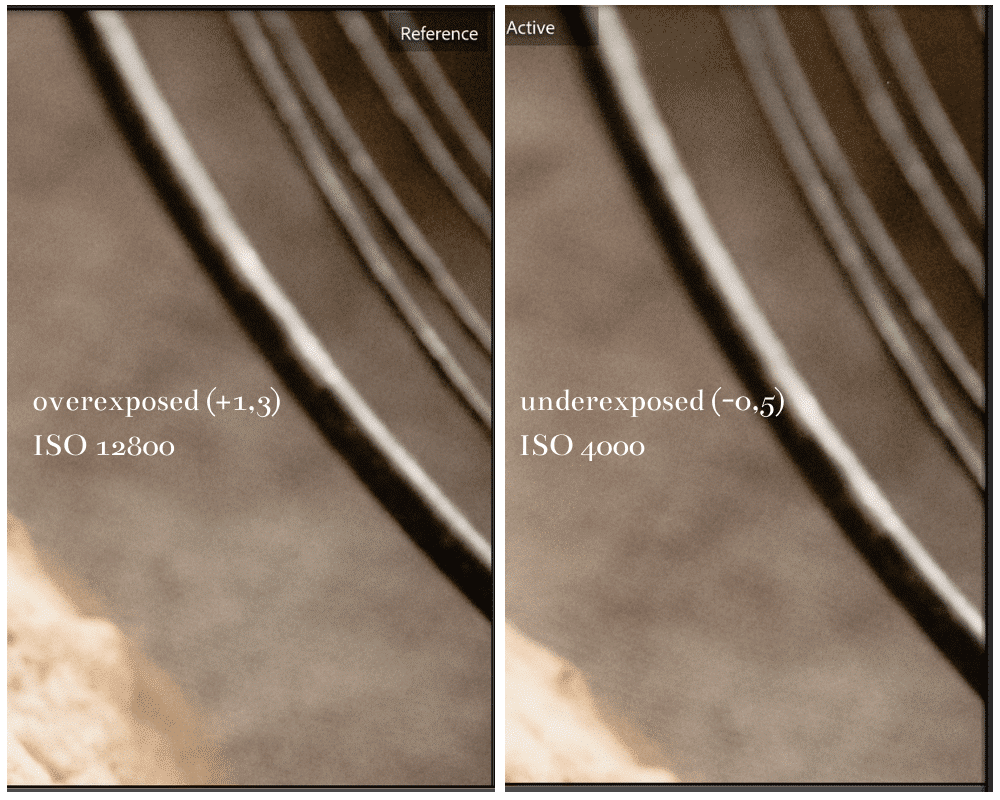
It also allows you to avoid very noisy images (even with high ISO).
Think about it: what happens when you have higher ISO and underexposed photo? You have to increase exposure in post production. If you increase it though, you will also increase noise.
In contrast to that, if you decrease it you gain more detail and win a sharp photo. Try!;)
[And yes, it's extremely important that you always EDIT your photos. Remember that your camera gives you a raw file, which is a collection of mere information, and YOU need to reorganise them]
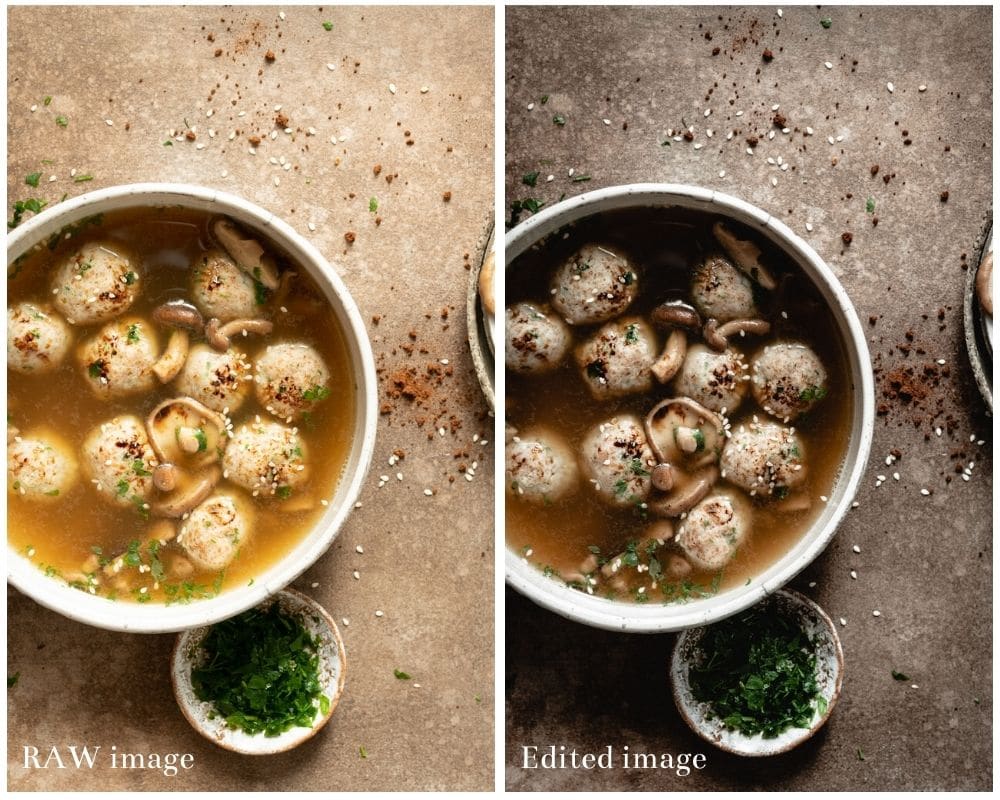
**I said "ESSENTIAL" because if some small areas of the photo - possibly not on the main subject - are blown out, well... we can turn a blind eye on that.
(P.S. Yes, when you expose to the right the image on the camera screen may be very bright, but trust the process. Also remember that image is just a jpg that the camera shows you.)
>>> IMPLEMENT TODAY:
While shooting, always check the histogram on your camera (or PC, if you tether): what is it telling you? Where are your information? More on the left? On the right?
In case it's more on the left, the image may be underexposed. So increase the exposure (play with ISO, aperture, shutter speed) until you have more information on the right.
EXAMPLE - PHOTO BELOW:
(zoomed 100%) One photo has higher ISO and overexposed while shooting (then decreased the exposure of -1,3 in Lightroom), the other has a lower ISO and underexposed while shooting (then increased exposure of +0,5). Still, the amount of noise is VERY SIMILAR.
4. Light in food photography has a meaning
Using light to communicate, one of my favorite topics!
Now that you know what your workspace offers, how you can manipulate light and how to expose correctly, it's time to think about WHAT you can say with light.
Our purpose as photographers is to communicate a message, right?
Otherwise, what’s the point?
In simple words: different level of brightness, contrast and direction of light, combined together, they all give a different result.
And the usage depends on what you are trying to say, without forgetting it has to complement the subject itself (think about texture, shape...)
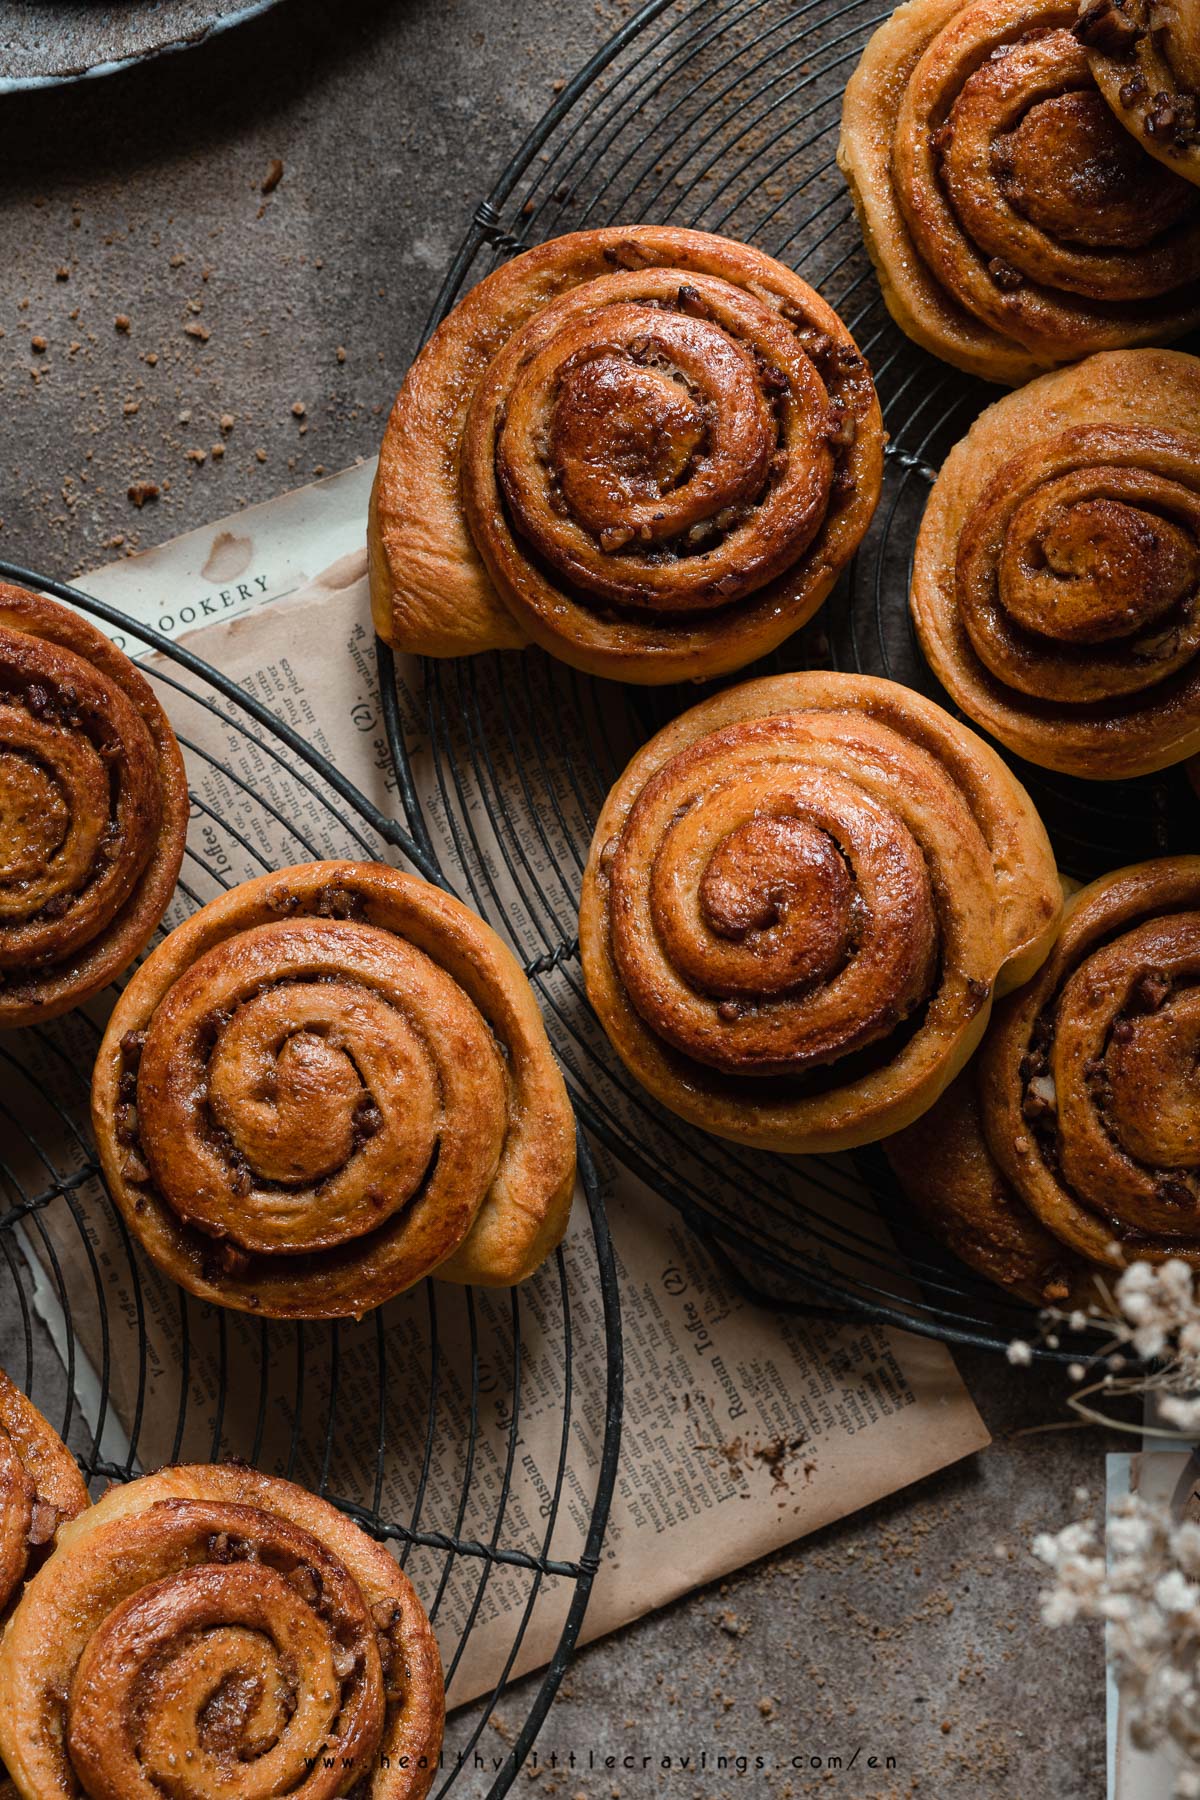
The photo below is much more likely to say “Fall” instead of “Spring”. It’s dark-ish, it has contrast, it definitely has that Autumn-y 🍂 vibe, also thanks to the warm tones.
The messages you can communicate are, I would say, endless.
You can decide to evoke yumminess. Freshness. Spiciness...
You can try to evoke moodiness. Happiness. Nostalgia...
You can tell your viewer what’s the weather outside while you’re eating that plate. Where you are... what time it is.
And SO. MUCH. MORE.
>>> IMPLEMENT TODAY:
Instead of using light on autopilot, try to manipulate light to convey the message YOU want.
So, first decide WHAT you want to evoke. What does that food tell you?
Then think about how your shadows/highlights need to look, the level of contrast, the intensity of light, in order to convey THAT message...
What are they saying? And what do you want to say?
5. Colors are equally important to light in food photography
In photography, colors are as important as light.
Long story short, we perceive them because we see light and its wavelengths.
“Color is important when it comes to setting people’s expectations regarding the TASTE of food and drink.” I read once.
True.
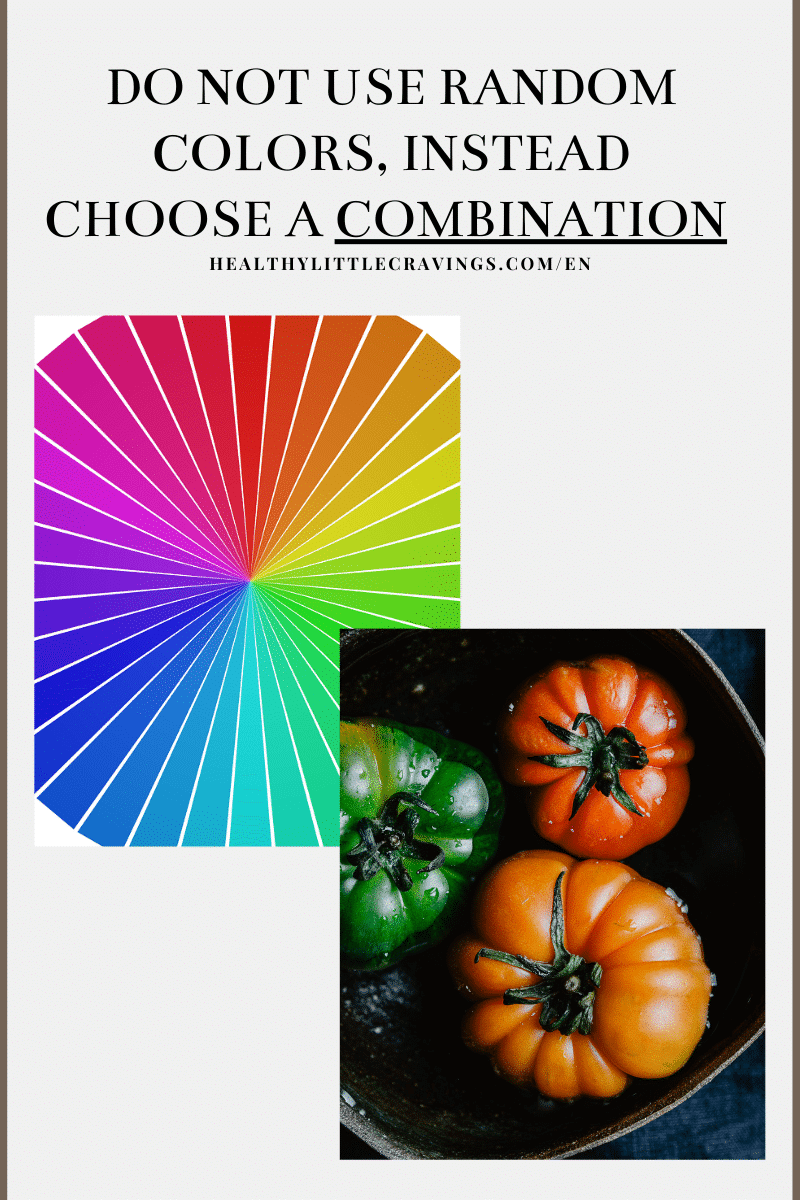
So, how can we actually combine them together? Well, using color harmonies!
Luckily, thanks to those who studied the subject, we already know that some of them work extremely well together.
Think about complementary colors, or analogous complementary, split complementary...

What about monochromatic, analogous, diadic and the others?

Remember that every color harmony can, again, convey a different message. Complementary colors, for example, are amazing if you want make your photo more energetic!
Monochromatic gives more peaceful vibes.
>>> IMPLEMENT TODAY:
Instead of randomly using colors in your photos, try to think about how you can combine them using the color wheel, without forgetting about the message you want to send.
So friend, I am 100% confident that by applying these tips on how to master light in food Photography you will improve so much.
Remember this is a huge topic and we could talk about this for hours. Indeed it's what I do with my #OFPProgram students. Enrolment is now closed but don't worry, I am gonna launch again soon (November)!;)
If you liked this post, please make sure sure to share it on Instagram! It would make me so happy! 🙂
Remember: if you found one or more of these tips useful, tag me on Instagram or DM me the photos!


Maria says
Such a helpful article Roberta. Thank you for sharing.
Roberta says
Thanks Maria! Glad it helped!