
Food photography camera settings:
You want to know how to start shooting in manual mode, right? Take five minutes and these 3 easy steps and you will master your DSLR.
If you asked me now what is the most exciting thing I’ve had to do with in these past couple of years (of blogging), well the answer would be – without a doubt – FOOD PHOTOGRAPHY.
So let me introduce you...Food photography 101 series!
DON'T FORGET TO PIN THIS IMAGE SO YOU DON'T LOSE ANY INFORMATION!
Briefly: it has been there in my mind for a long time.
Creating a "photography" section in my blog sounded like the perfect icing on the cake after this long journey learning food photography.
I mean, I myself still have so many things to learn. I am one of those people that will for ever and ever say ‘you'll never stop learning’.
In two years of blogging, I’ve watched a massive amount of tutorials on Youtube, read so many posts about photography and food photography, also took a live workshop (with the lovely Valentina Solfrini) and a course with Sarah Fennel .
As a consequence, I really wanted to put my knowledge out there to help people learn quickly how to create stunning pictures.
And what’s the best way to teach a beginner how to really rock photography?
Creating a ‘series’, am I right?
Then let's go!
Food photography camera settings:
make friends with ISO, APERTURE, SHUTTER SPEED!
Let me say, I've always hated theory.
Bad news is: we need it.
Good news is: I will make practical examples so you will understand what the best food photography camera settings are and how to start shooting in manual mode in five minutes!
It may seem a struggle at the beginning. Maybe you don't know where to start from. Maybe you already have read so many posts. But wait, don't throw in the towel! I've been there and I know how to solve these 'beginners' problems'.
Learning how to shoot in manual mode will allow you to take control of your camera and...will give you confidence!
It's easier than you think, REMEMBER THIS SENTENCE:
"manual mode is about achieving proper exposure by creating the perfect balance between shutter speed, aperture and ISO."
Easier said than done are you saying? Nah. I promise, it's easy.
The eye metaphor
Think about these 3 basic settings as a human eye.
- ISO is the eyes’ sensitivity to light. If there’s a super sunny day and you go outside, your eyes - when you first step out of the room - are extremely sensitive to the harsh light, everything seems so bright and this is like having high ISO. If you stayed out in the sun for a few hours, your eyes won’t be that sensitive anymore (lower ISO), they're 'used to it'.
- Aperture is like your pupils: when there is a ton of light, pupils will adjust and will become smaller to allow in the right amount of light. And viceversa.
- Shutter speed is like blinking the eyes. If there is plenty of light we need to keep our eyes open for a shorter amount of time. Right?
Same thing for your camera.
1.ISO
ISO is the camera's sensitivity to the light.
Personally, this is always the first step I take. I always try to choose the lowest ISO possible (possibly 100) to make sure I get the least amount of noise.
In fact, by increasing ISO you will be able to capture more light, but you'll also have more noise (graininess).
Increasing ISO is useful when you want to also increase shutter speed to capture movement (ex. action shots: sauce dripping, pouring water, drizzling oil...)
P.S. remember newest cameras tolerate higher ISO better.
2. Aperture
In your mind try and associate Aperture with depth of field.
When you see a small number (like F/1.8), it means wide aperture: more light comes in and just a small portion of your photo will be in sharp focus, the rest will be blurred. See this pistachio butter? (see info below)
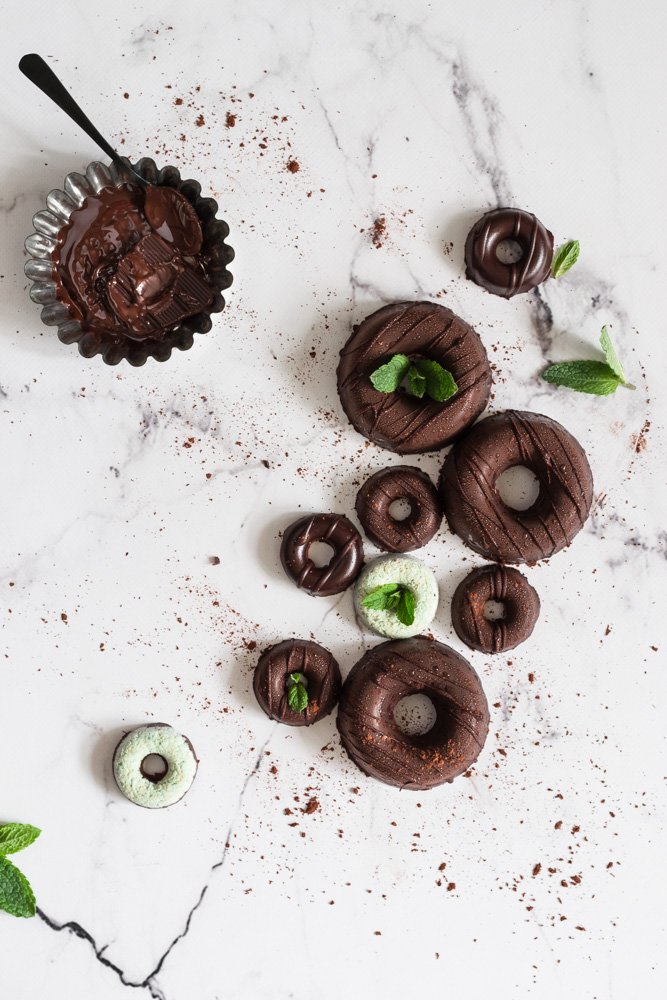
A higher number on your camera (ex. F/11) will indicate you have less light coming in and a small aperture: you'll have more details and the perimeter won't be that blurred. Does it make sense? Are you following me? Increase the F/STOP when you're doing overhead shots like this.
3. Shutter speed
There's another element that changes the amount of light coming into our camera: shutter speed.
To put it simple:
- a faster speed is used to freeze action. In this shot I've set it to 1/40 sec but I also increased the ISO.

- For a blurred action, you should choose slow speed (ex. 2") - try and google 'slow shutter speed photography' for some examples.
WANT TO LEARN MORE? BOOK A SESSION! IT'S TAILORED TO YOUR NEEDS!

To sum up
Remember that all camera settings, all three of them, will impact on the overall EXPOSURE.
You could also use Exposure compensation on your camera but we’re gonna talk about that in depth in another post!
If you have any question, please feel free to leave a comment below, write me on Instagram or email me! I’m always so glad to get in touch with you!
Hubert says
What focus settings do you use when photographing motion (liquids and powders)
healthyLC says
Hi! I can't answer because every light situation is different!:/ just experiment. And remember that you need a high shutter speed.
dee says
Great article! You photography is stunning!
I stay away from low Shutter and it always has a price....
Since your shutter speed is low and the pictures are so clear was wondering weather you are using a tripod?
healthyLC says
haha I hope my english was good 😀
Yep i ALWAYS use a tripod, I've got shaky hands :/