Hello friend.
I know you're here to learn how to edit photos with Photoshop, BUT first let me say one quick thing.
Someone once told me (about Photoshop) "Don't worry, you don't need to know EVERYTHING, every single tool. Just the little things you actually need to finalize, perfect the image."
SO TRUE.
Please, you don't have to worry if you don't know how to do every.single.thing the software allows you to do.
Of course if you want to be a post producer, well, in that case you need more knowledge.
In case you're a photographer, or wannabe photographer, instead... keep reading because these basic tips will be very useful.
How to edit photos with Photoshop - the 3 essential tips
First I must say that everything I know (and I am gonna share here) is something that I have learned thanks to trial and error, since I started using it when I was a teenager (more than 10 years ago, oh wow).
I invested in a lot of courses throughout the years, but with Photoshop...well, I am self-taught.
Not saying this to discourage you to invest (quite the opposite), but because I want you to understand that a lot of the things are very doable, and nothing super complicated.
To edit my photos I always use Lightroom first (you can also use other raw images manipulation softwares), then Photoshop for retouching, in case it's needed.
And the following are the things I do the most, in PS.
[P.S. in general it's always better to work on your raw file first, with Lightroom, Capture One, Camera raw in Photoshop or whatever you prefer, and THEN use PS for retouching]
1. Fix the issues in your food photos [clone]
I am aware of the fact the this title is a bit vague, so let me be more precise.
When I say "fix the issues" I mean that you can use it to:
- Adjust issues on your FOOD
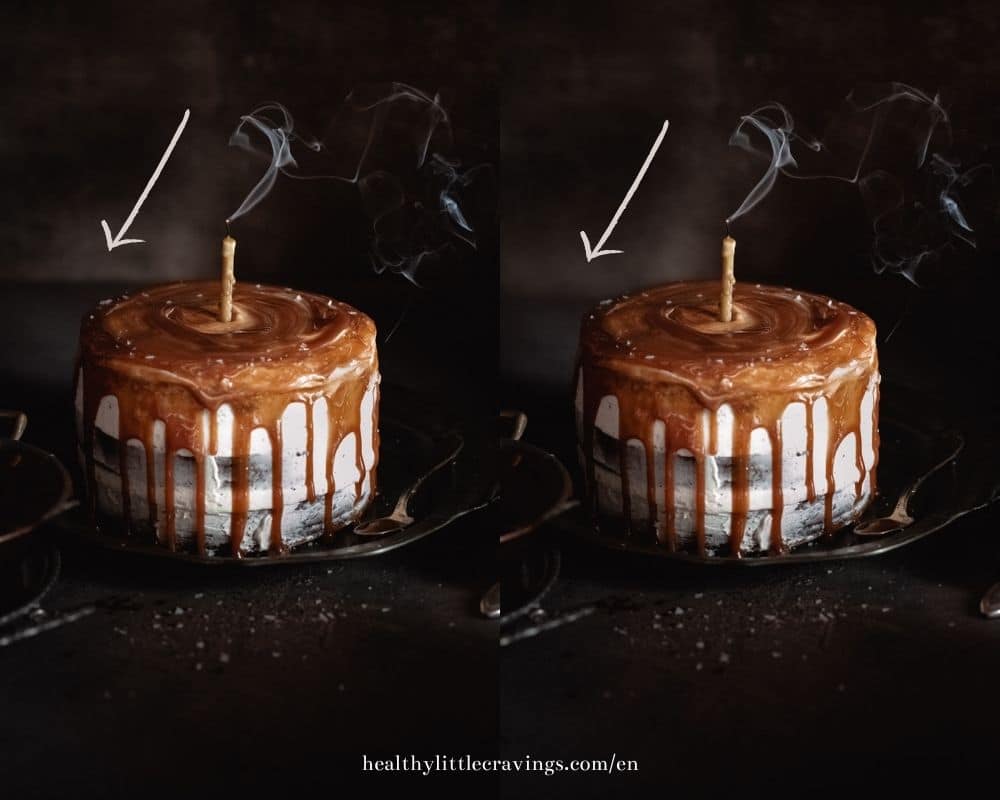
- Or adjust things on SET (for example when something in the scene - the backdrop, the horizon line etc... - looks "weird")
Remember: Photoshop, and other softwares, usually offers different ways to do the same thing (or almost). Think about how you can adjust contrast in Lightroom, you have a few paths to follow, right?
To fix these kinds of issues (broken piece of cake, too many seeds on your backdrop, not enough blurred horizon line etc), for example, you can use different tools (select the best one for the specific case).
Remember that the goal is NOT the viewer to see the adjustment.
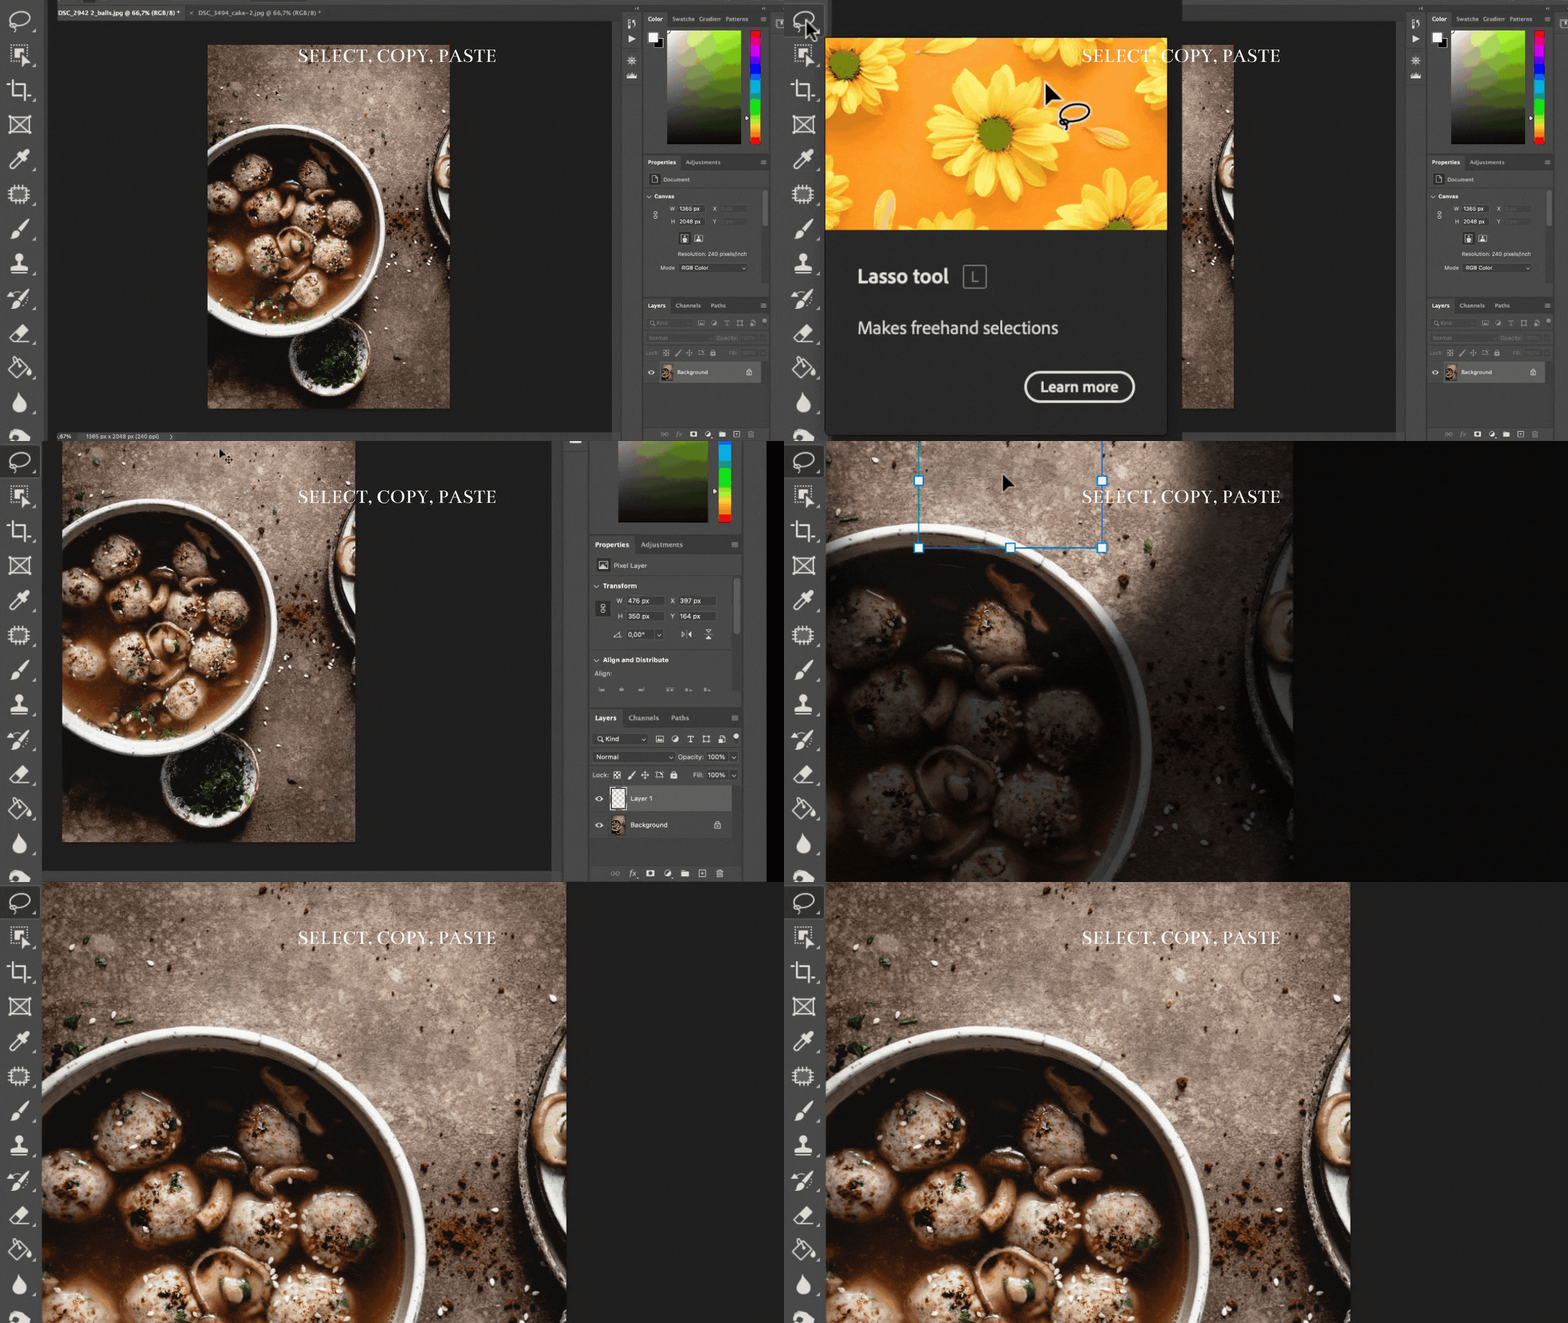
- Simple copy + paste
Sometimes using the Command C + Command V (copy + paste) is simply what you need. THIS is great especially when you have large areas to fix and they look very very similar in texture and color.
How to do it: using the lasso tool, select the area that it's going to replace the "issue", click Command C then Command V. Now drag it on top of the issue and, using the eraser, blend the edges. Very simple.
- Spot healing brush
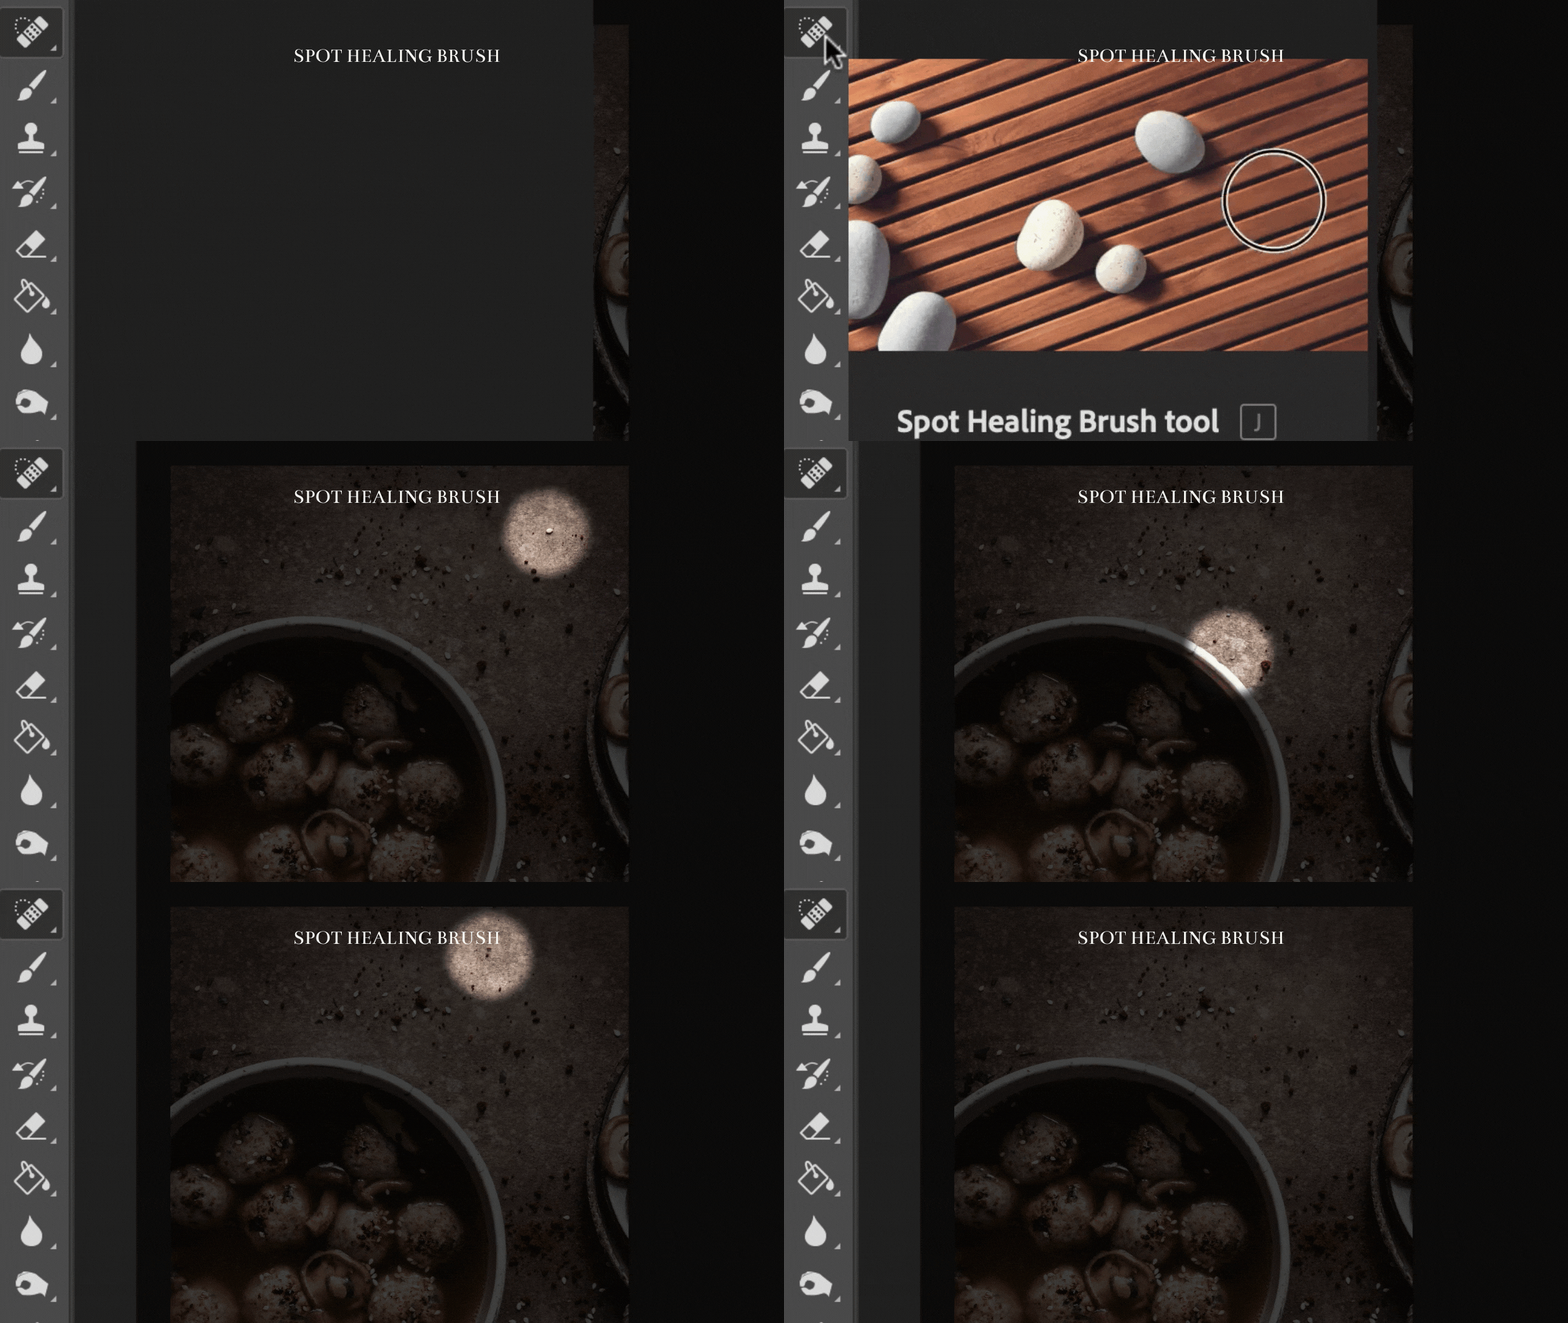
This is great for tiny areas (seeds on your table or on your food, tiny undesirable spots...). Experiment with it!
How to do it: select the tool, then click on the spots you want to eliminate.
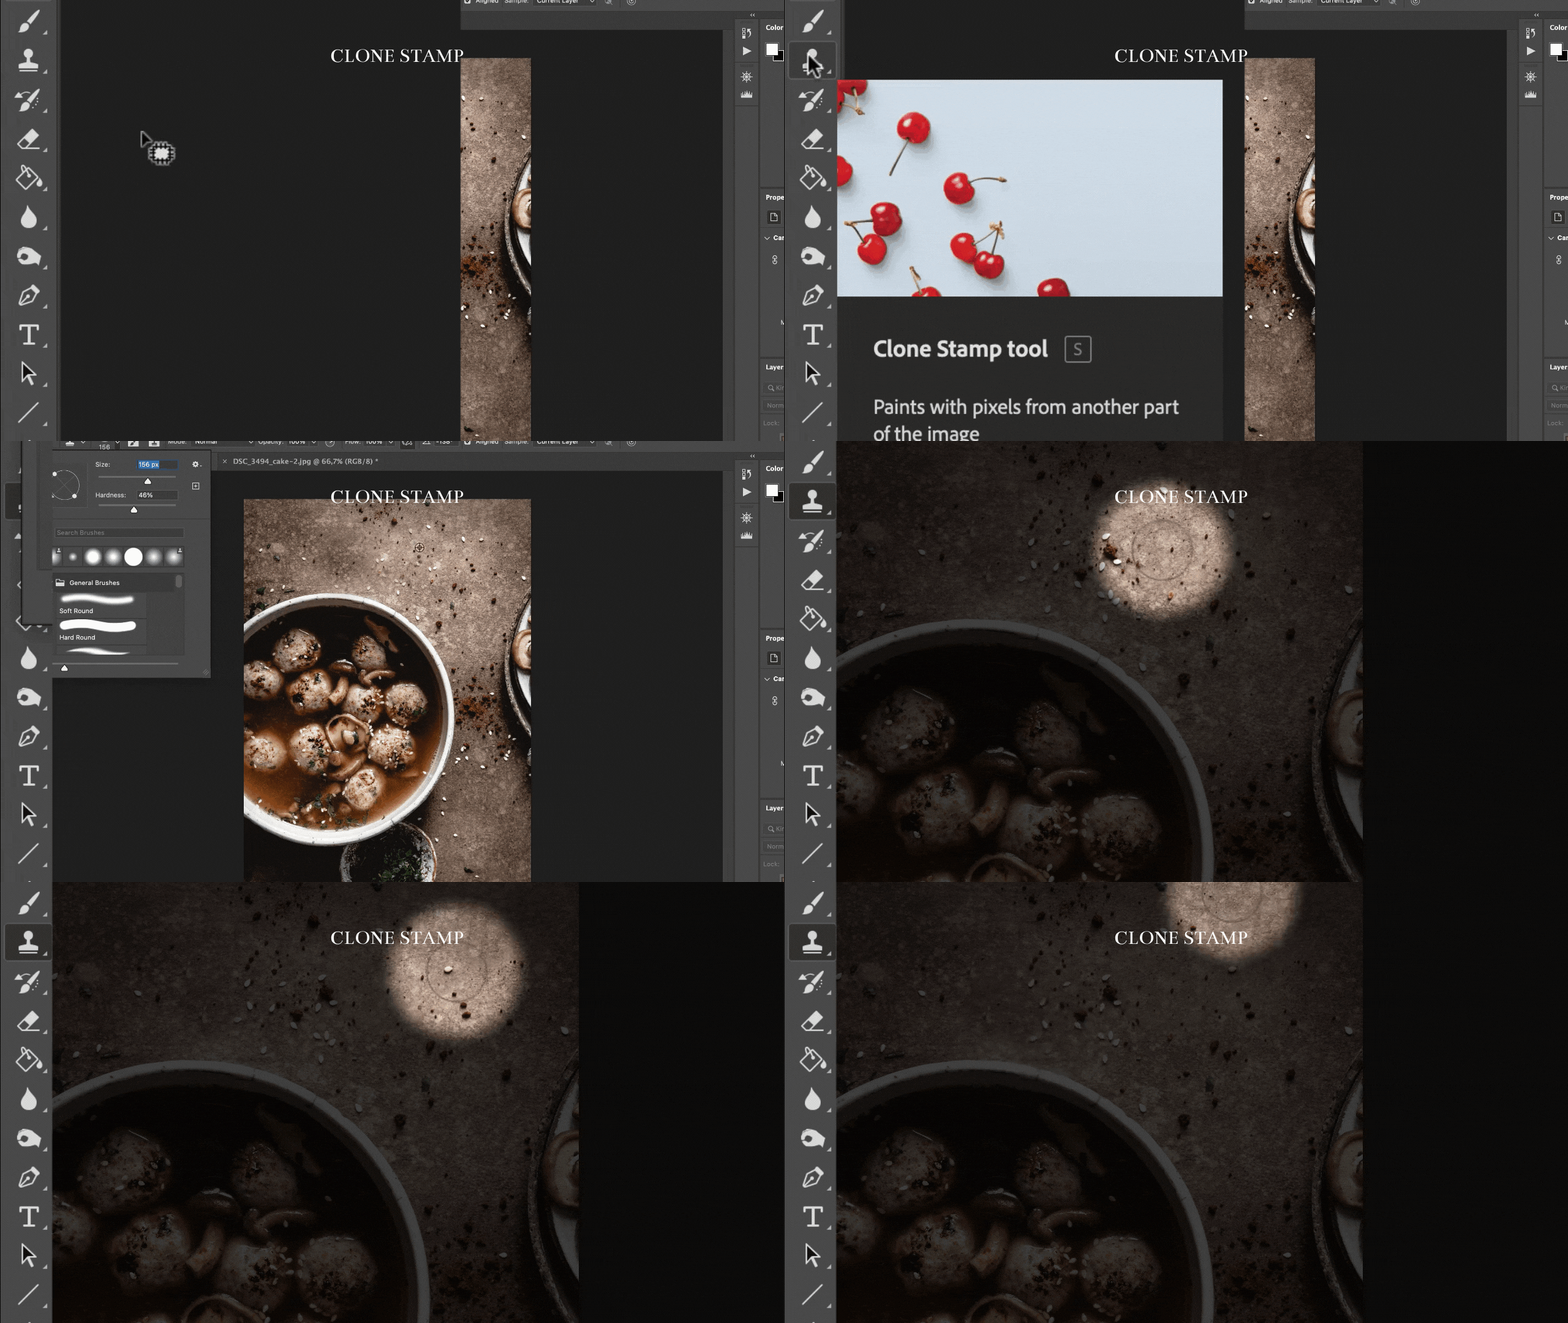
- Patch tool or Clone stamp
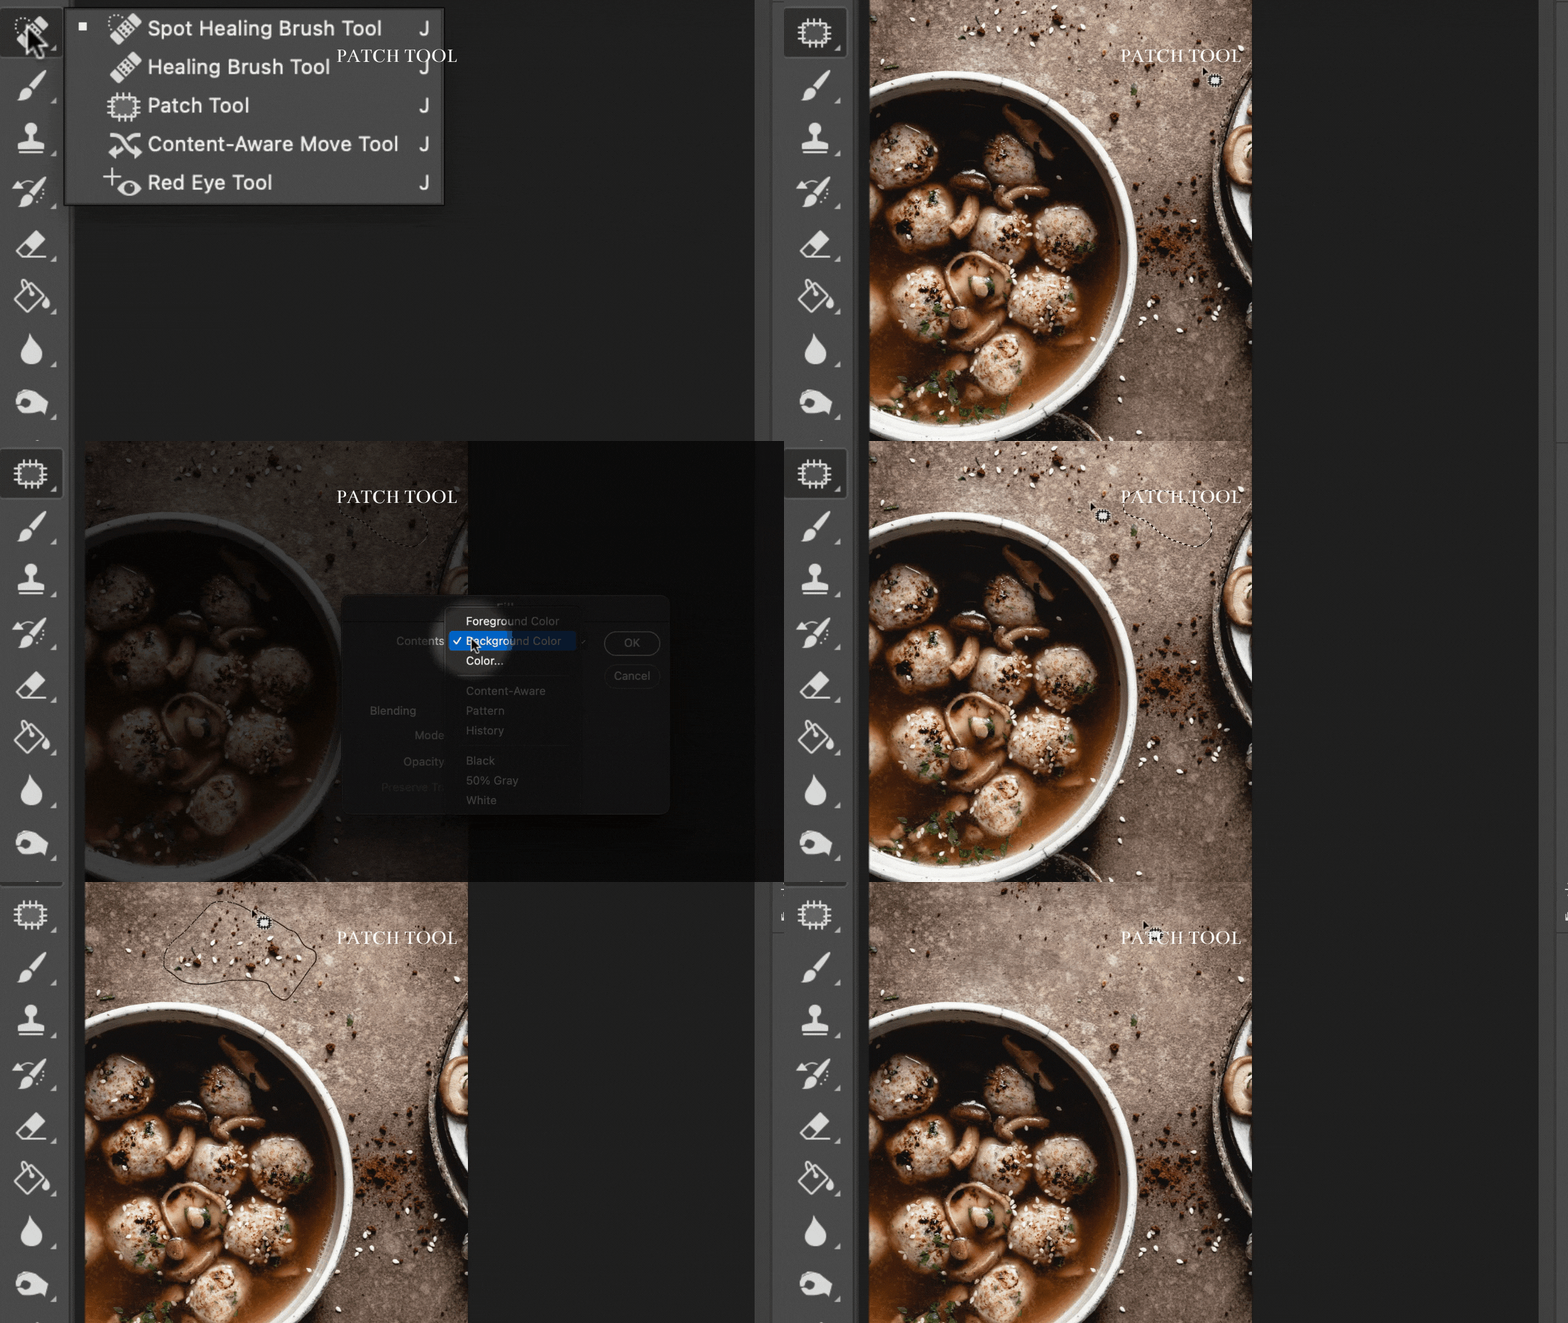
With the patch tool, like PS says, you can "replace a selected area with pixels from another part of the image".
How to do it: select the area you want to replace, then click delete on your keyboard, select "content-aware" and ok. This sometimes can be less precise than the clone stamp.
Clone stamp is my favorite. These are two very similar tools, but with the clone stamp you can be more precise because you can literally "paint" with the same pixels from another area.
How to do it: click option on your keyboard, then (holding the option) click on the area that it's going to replace the "issue". Now paint with the brush on the problematic areas.. I recommend adjusting the size and the hardness of the brush based on the issue.
In the example below, I didn't like the horizon line so I've used the clone stamp tool to fix it.
2. Create composite photos
Ah! This is one of my favorite things to do in Photoshop.
It happens sometimes that you don't have enough food to fill a bowl or drink to fill a glass.
It also may happen that you want to include human element (hands), but it's just...you and no one else in your studio/home studio.
That is when creating a composite comes in handy. You have to come up with this solution WHILE shooting.
How to do it: in case you don't have enough food to fill your bowls/plate, take a first photo with the main subject (full), then move your food and take another shot (or more).
Same thing with drinks.
In Photoshop, import all the photos, then select, copy and paste, and use the eraser to blend the edges.
This is what I did here with my coffee granita in the example below. First photo was an action shot (not appearing here), then I took a photo of the granitas in the background, also the one in foreground. And created a composite in Photoshop.
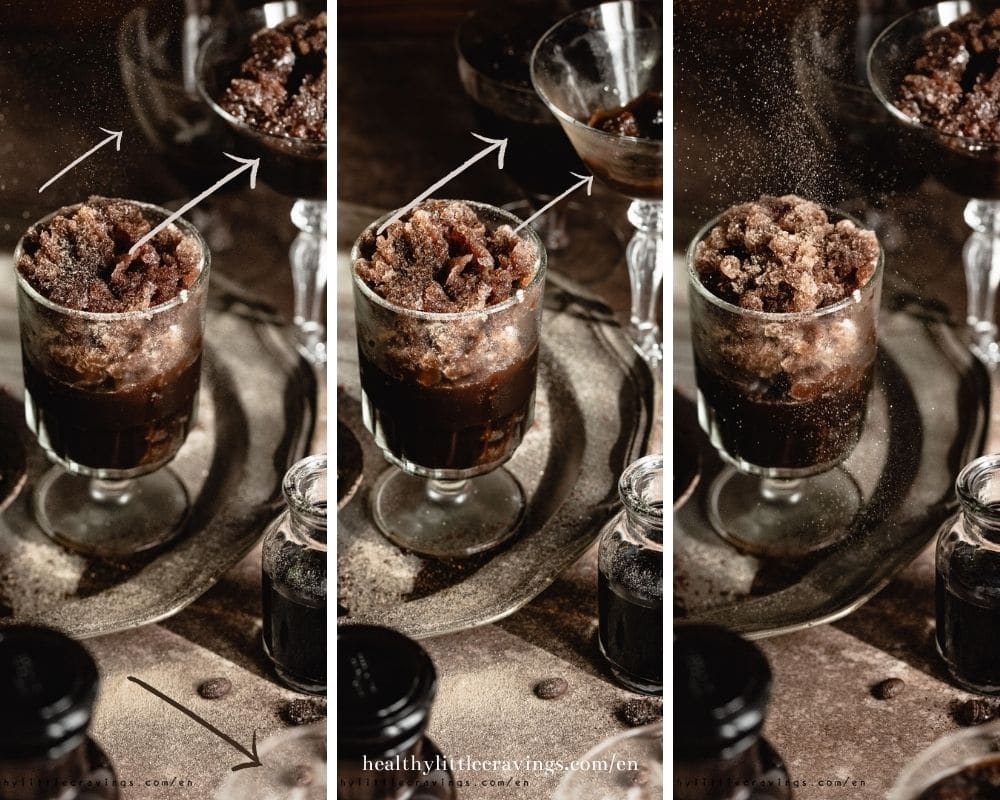
When it comes to using a human element in the frame instead, take different shots with your hands in different places. Then select, copy and paste on the main photo.
3. Change color!
This instead is super fun! Indeed you can do this just for fun, or maybe to harmonize colors in the photo and create an aesthetic.
In the video below, you can see how I changed the backdrop from green to brown, still maintaining texture and shadows.
How to do it: open your photo, click on Layer > New Fill Layer > Solid color, choose the color. From the blending mode menu choose Color. Now select the area you don't want to change color to, click on the mask layer (the white rectangle next to the colored one) and brush it with a black brush.
Please note you can sometimes do this in Lightroom too. It really depends on what you need to change color to, and how big the area is.
Now you know more about how to edit photos with Photoshop
Like I said before, of course there are a lot more things you can do but these are the main things I use Photoshop for.
Hopefully it was not too difficult, but in case you have questions, leave them down below in the comments!
If you liked this post, please make sure sure to share it on Instagram! It would make me so happy! 🙂
Remember: if you found one or more of these tips useful, tag me on Instagram or DM me the photos!
Want to learn more about food styling instead? Start with this!



clippingpathlab says
wonderful your photography...!
Roberta says
Thank you!